Fairholme Range, AB, Canada
6 August 2021
With Kevin
Note: This is neither a hike nor a scramble. It is a serious climb with plenty of loose rock, unreliable holds, and severe exposure. If you slip on any of the cruxes, the slabs, or the upper ridge, you’ll most likely plummet to your death. Climbing/approach shoes are highly recommended, and most people would probably appreciate having a rope.
Tough climb up loose rock and steep slabs
My third and finally successful try to climb this tough little monster. When Richard and I attempted to scale it the first time back in 2015, a near fall on a piece of rock that gave way under his feet before we even reached the first crux made us scale down our trip to nearby Morromount. The second time with Kevin in June this year he unfortunately fell ill on the approach and we had to retreat… Now it was redemption time!
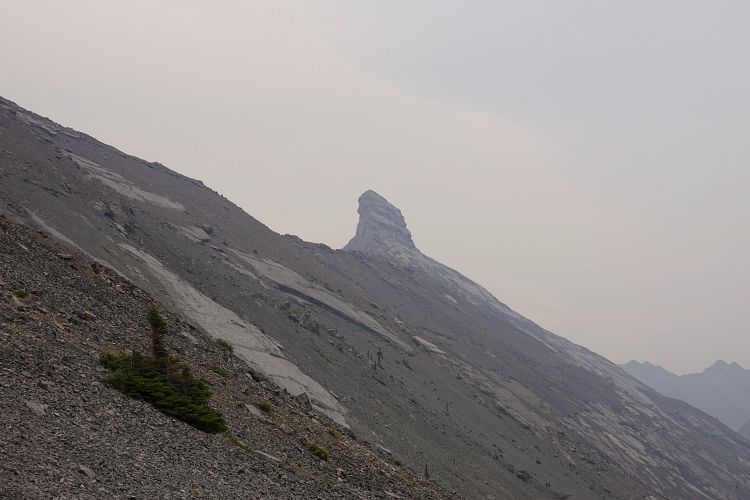
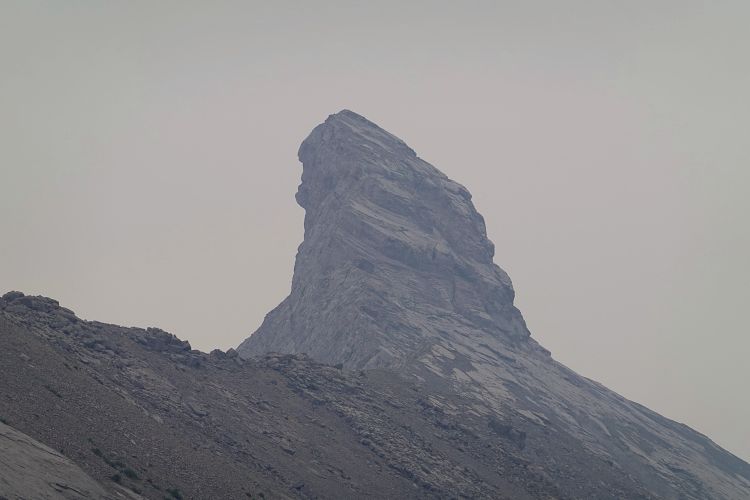
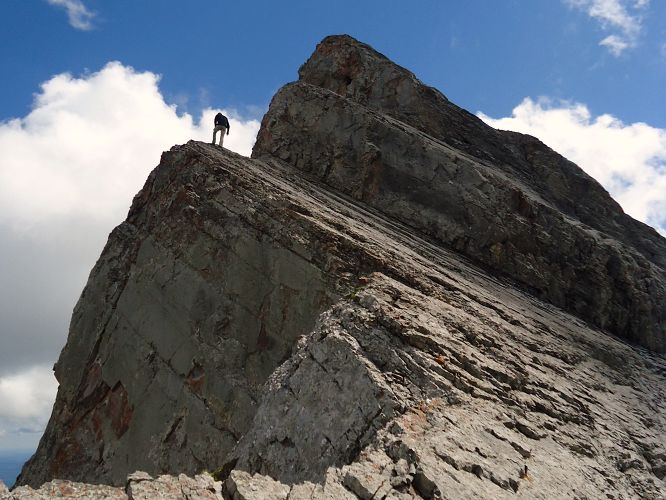
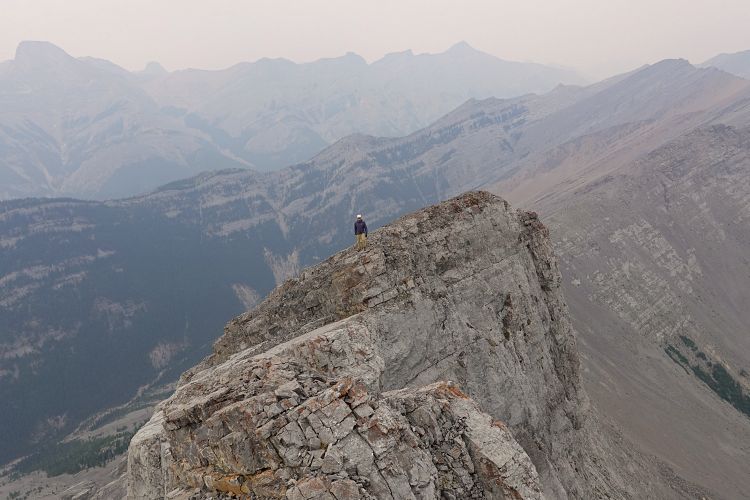
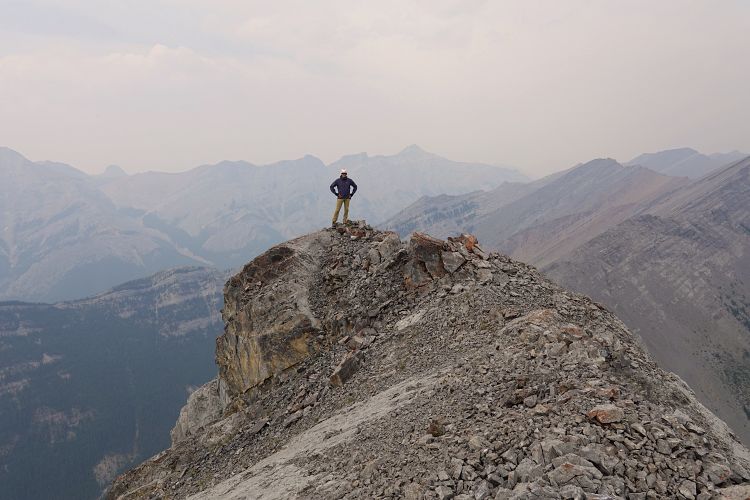
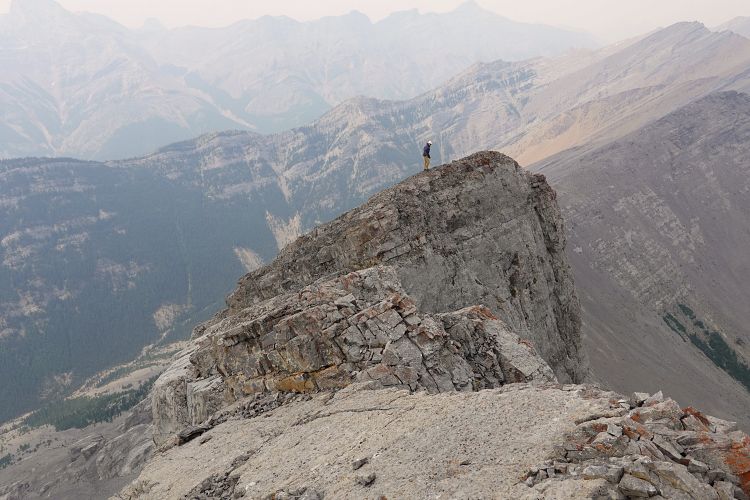
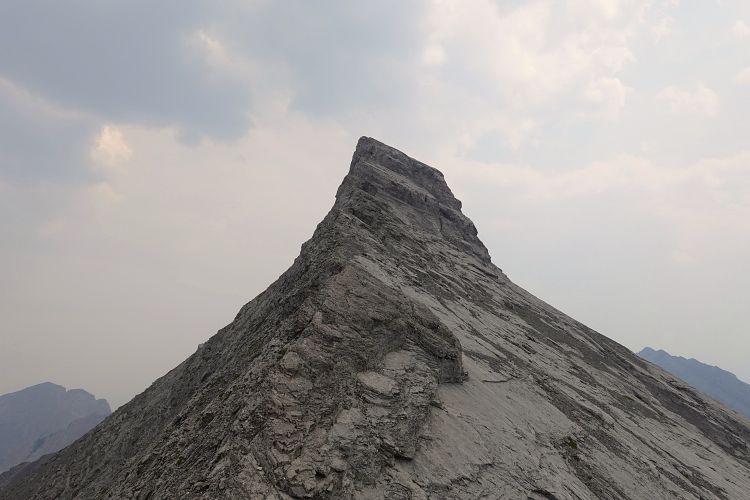
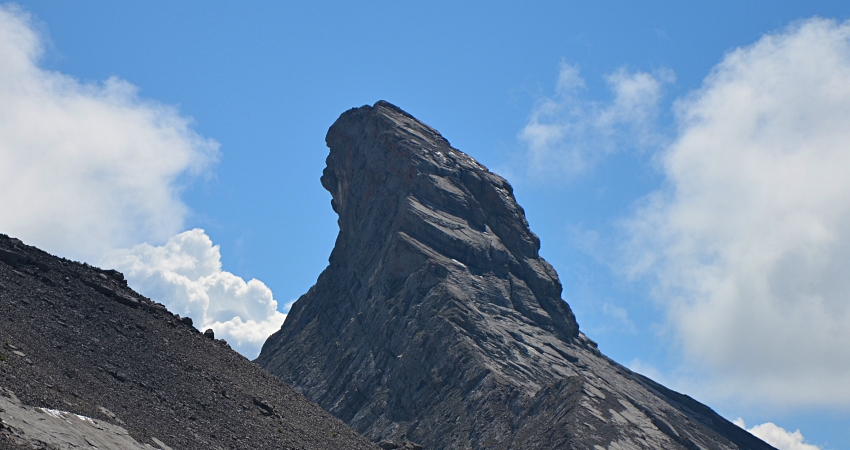
Hassel Castle, which is incorrectly labelled “Old Fort Peak” on Bivouac and Google Maps (and is sometimes spelled “Hassle Castle”), is a slender hunchback-style peak situated between Morrowmount to the north and Goat Mountain to the south. Its summit tower can be recognized from as far away as Highway 1. From Jura Creek or any vantage point west or north it does look a bit like a miniature Matterhorn. Ever since I had first seen it on my slog up to South Ghost Peak in 2013 I’ve been itching to take the challenge and conquer its distinctive summit.
There are probably not many parties that have ever climbed it, and I’m only aware of the famous Rick Collier in 1993 (possible FA), Grant Myers sometime in the 2010s, and Robb Schnell a few years ago. Too steep are the slabs on the west side and too daunting the overhang on the east side for most people, if they even make the trudge up Jura Creek this far, to consider it. Of course there could be many more quiet ascentionists that don’t write about it in a blog!
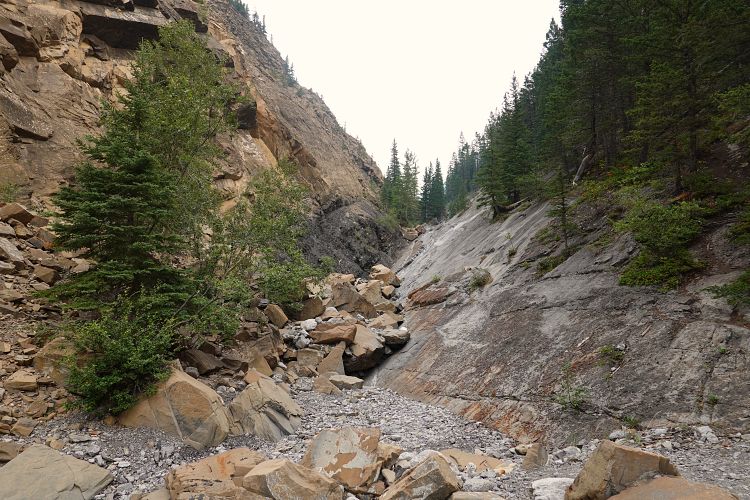
This was my 6th slog up rubbly Jura Creek, but there are now bits of trail again after the devastating 2013 floods, at least to the “false fault” where a succession of colourful rocks is nicely exposed in a narrow gully. [For those interested: it’s Mississippian Pekisko grey limestone overlain by black shales of the Banff Formation, with light brown shales of Cretaceous Ellerslie Formation on top. So, not actually a geological fault but it looks like one.]
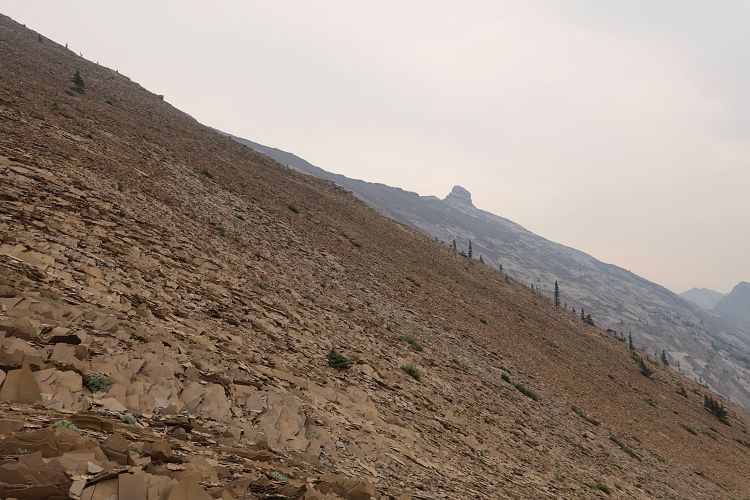
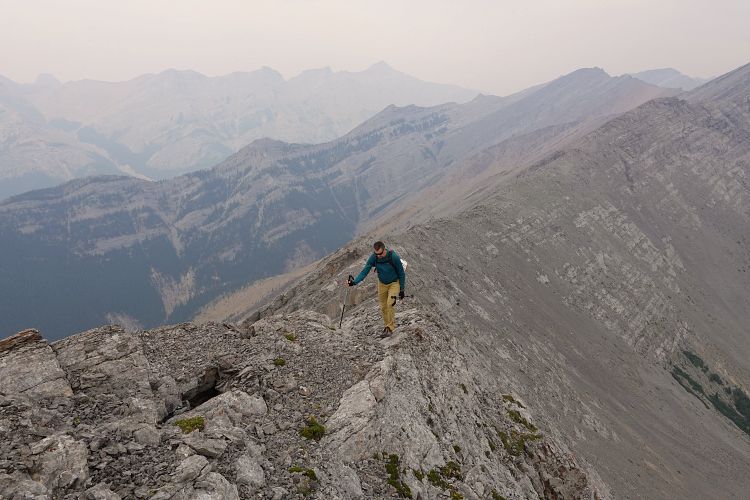
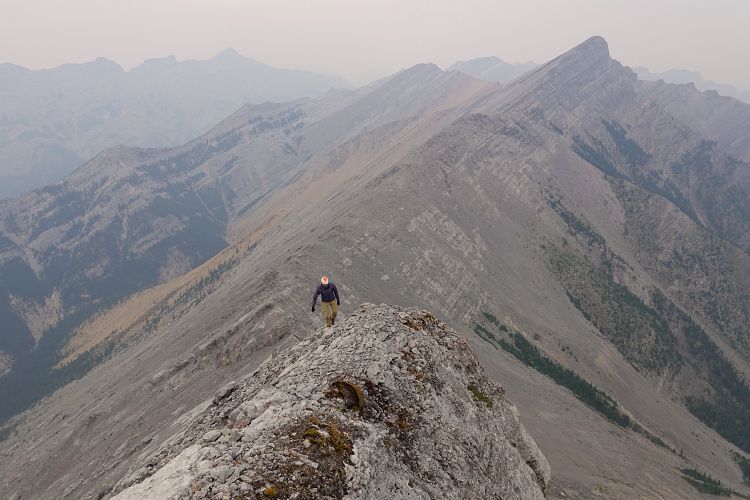
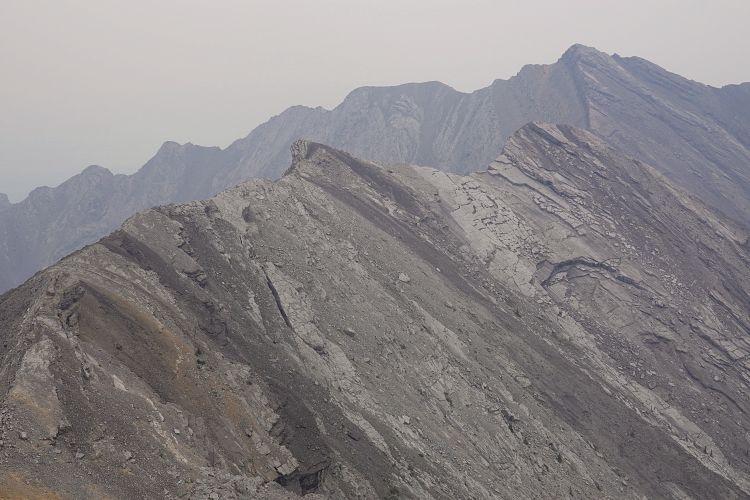
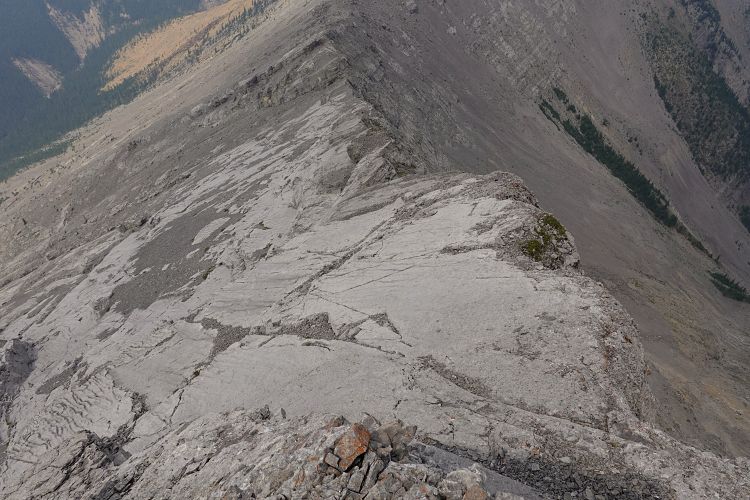
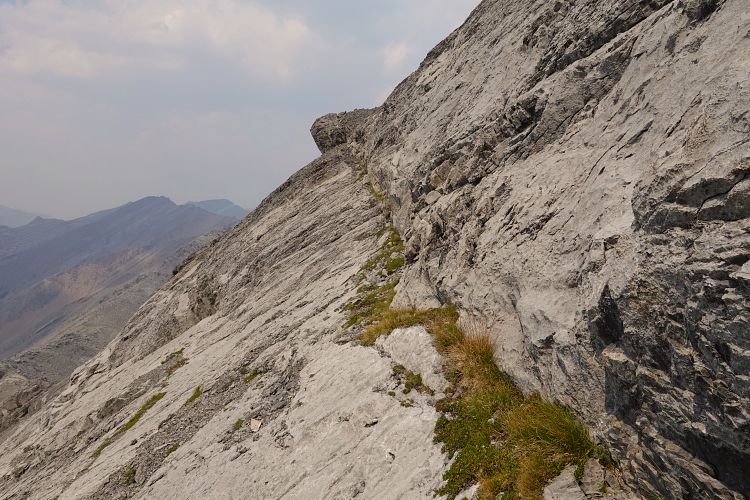
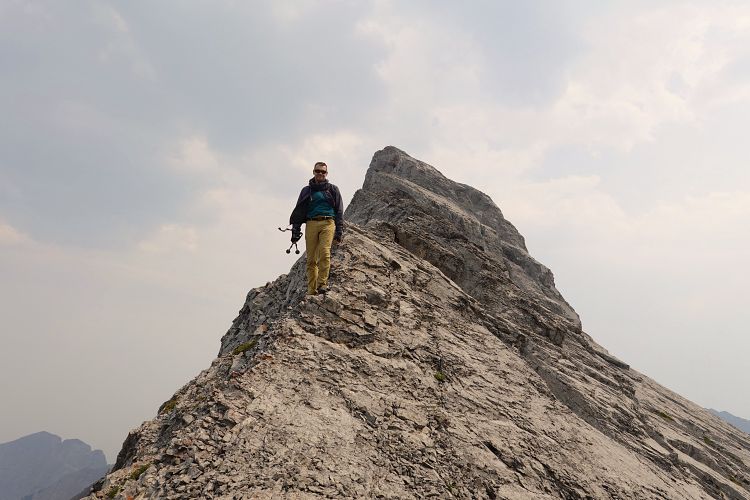
After about 7 km up the creek Kevin and I reached a rib of brown shale coming down the west side, which we then trudged up to almost near the top of the ridge connecting Morrowmount and Hassel Castle. There is a good goat trail that veers right (south) just before some flat grey limestone slabs, which avoided unnecessary elevation gain and took us to the saddle on the ridge further south.
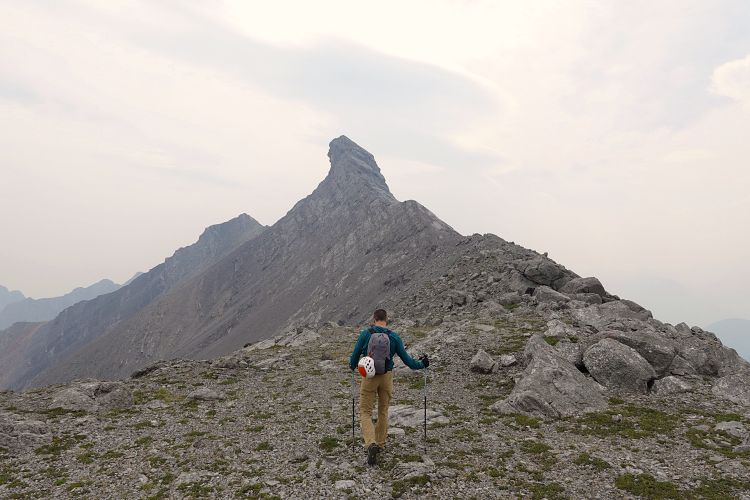
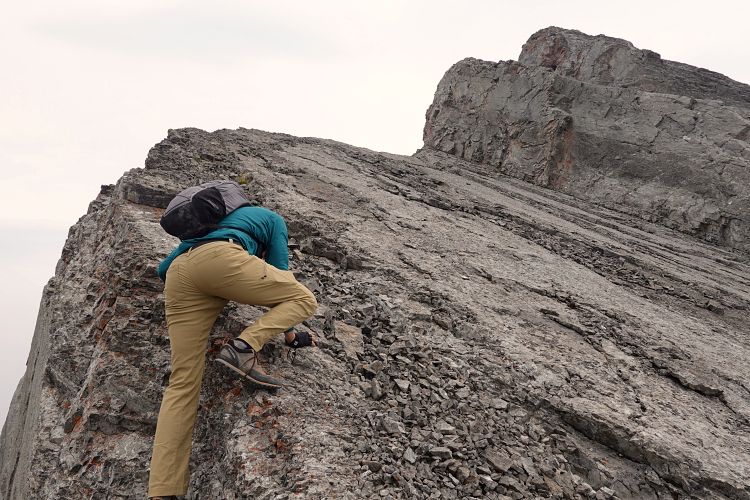
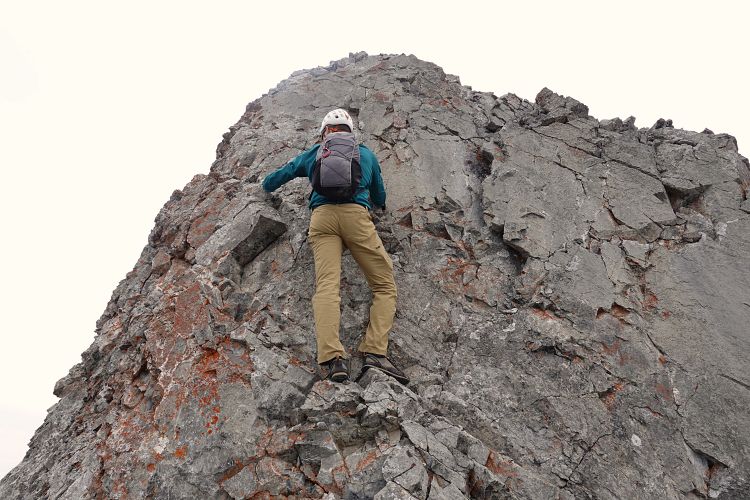
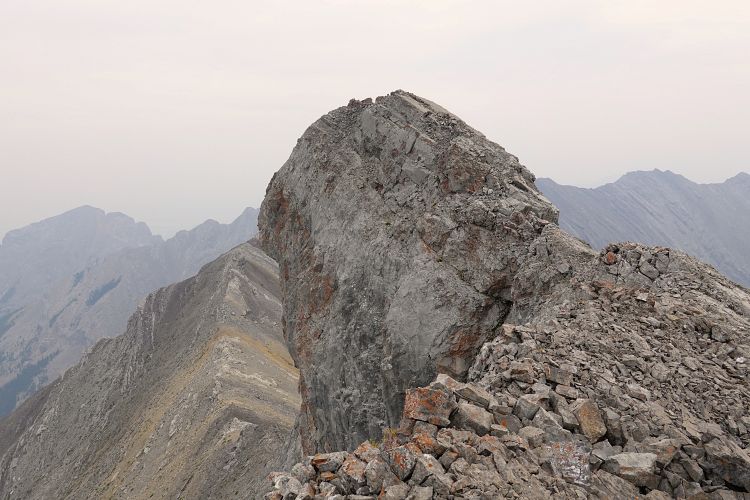
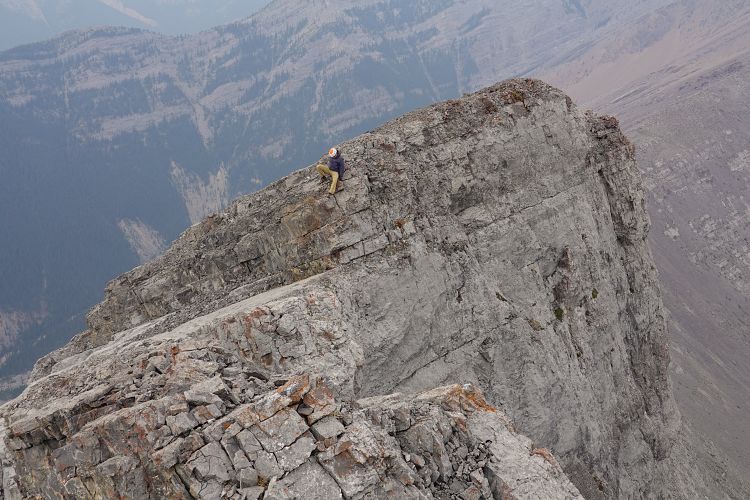
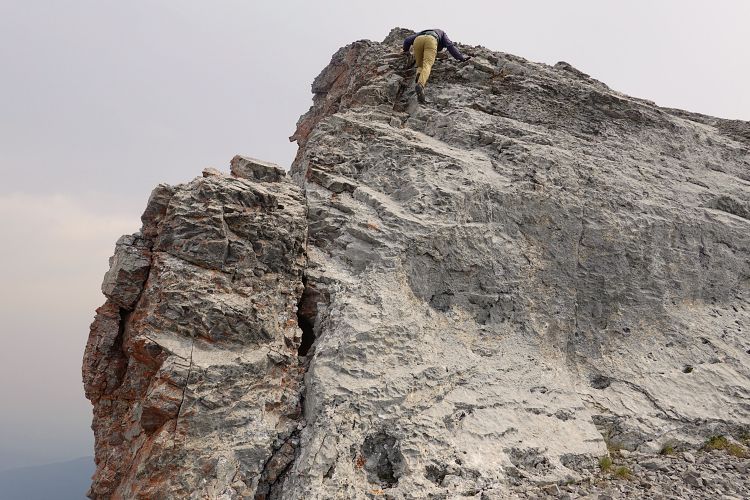
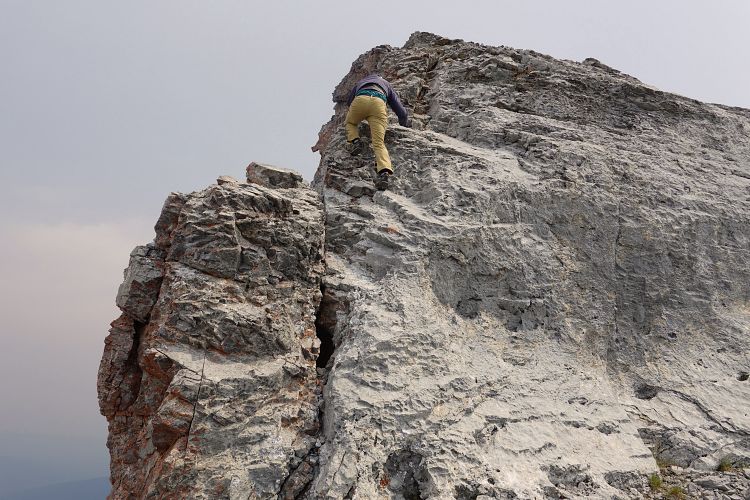
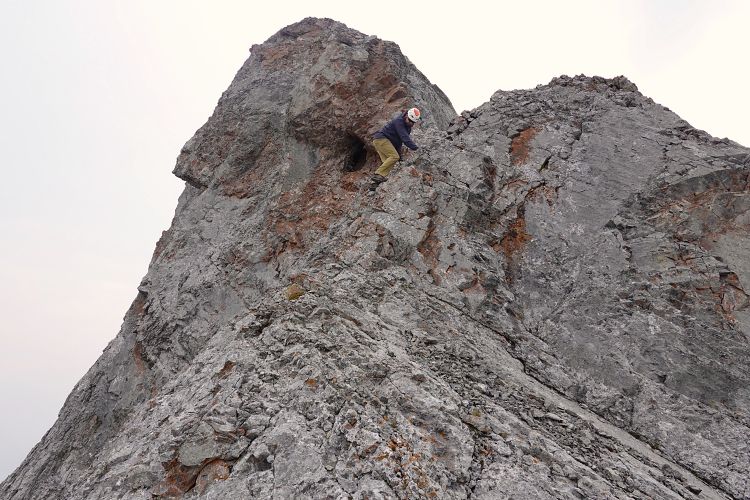
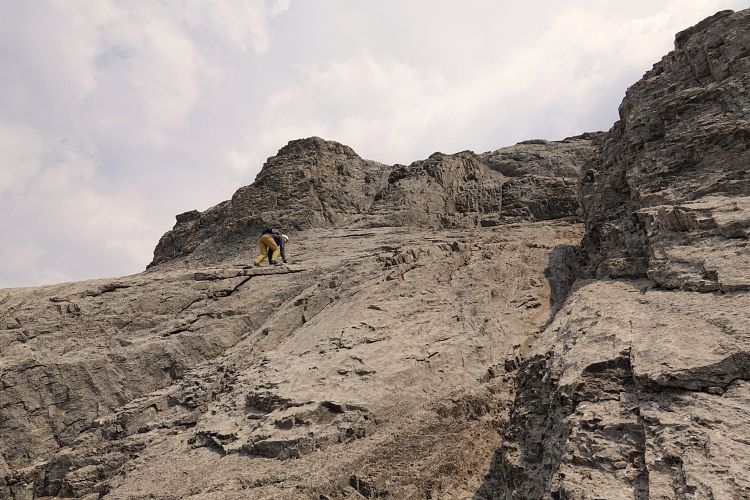
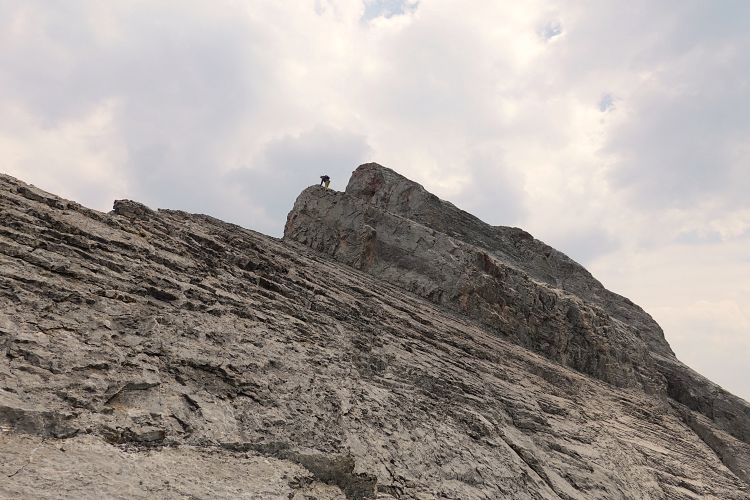
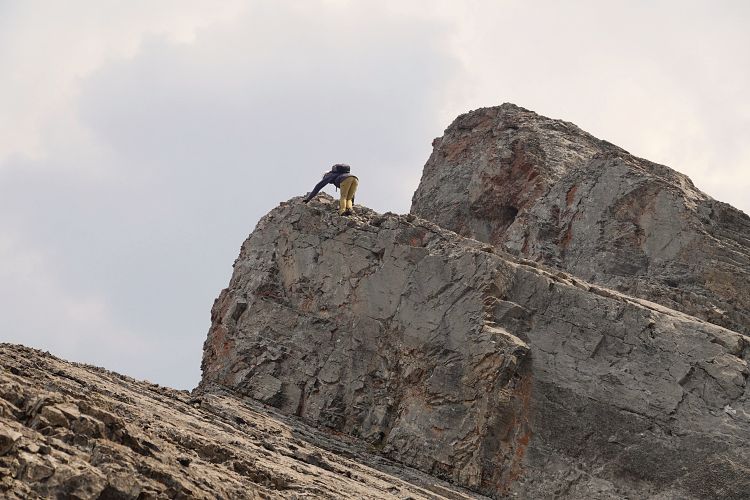
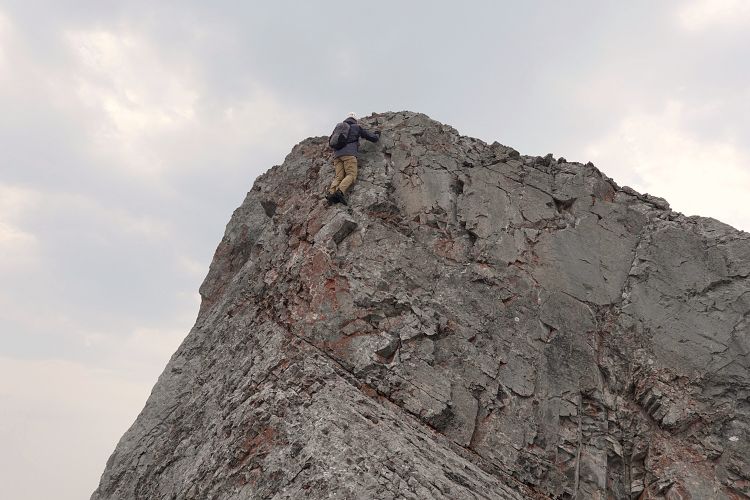
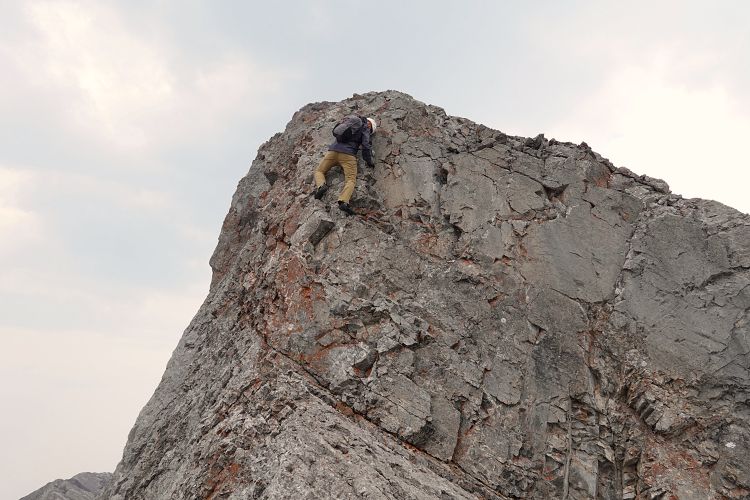
This is a great spot to sit down on some grassy patches and take a good break before the real work begins. The ridge crest can be easily followed to the base of the summit tower, just below the first (and main) crux. We left our poles here and switched from hiking boots to approach shoes, which was the best choice we could’ve made given what was to come. The first crux is basically a 6 m vertical cliffband with a giddy drop on the left and steep, downsloping slabs followed by more vertical drops on the right. Rock quality is poor and holds are often loose, with the “easiest” and least crumbly line being on the far left side along the spine of the ridge where exposure is greatest. I was glad to have Kevin, an experienced climber and mountaineer, lead the way as he slowly but surely made his way up, testing every piece of rock he touched. His line took him directly up, then slightly right near the top of the cliff where hand holds are particularly unstable. My turn was slower and took me a bit further left near the top. Personally, I’d say this is as far as I’d want to push climbing / scrambling without a rope.
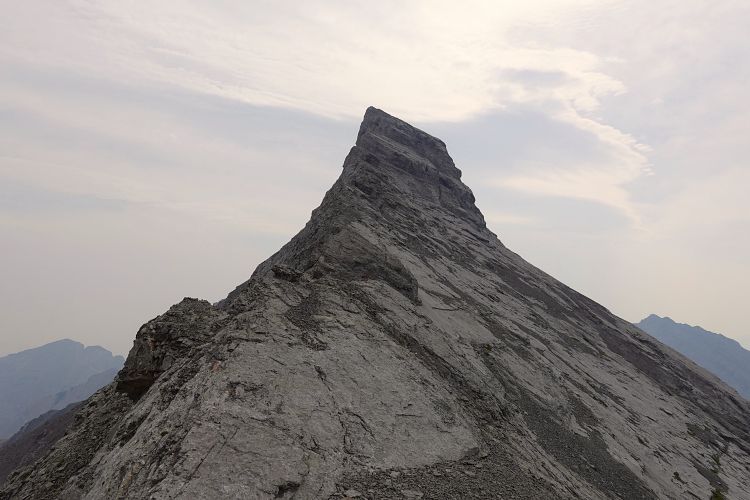
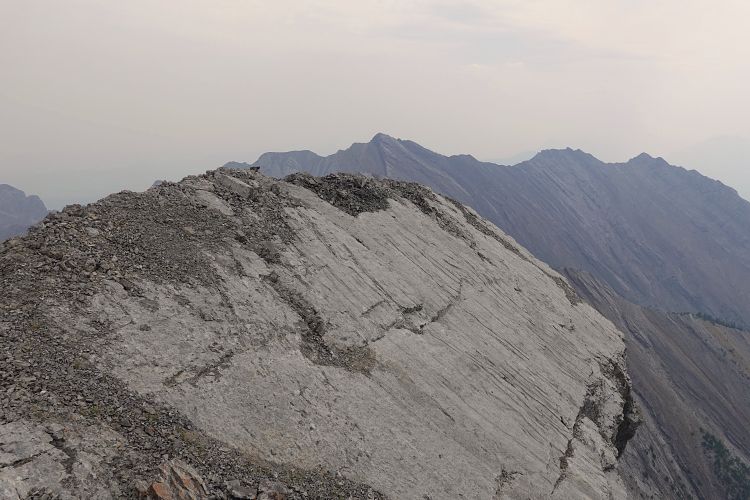
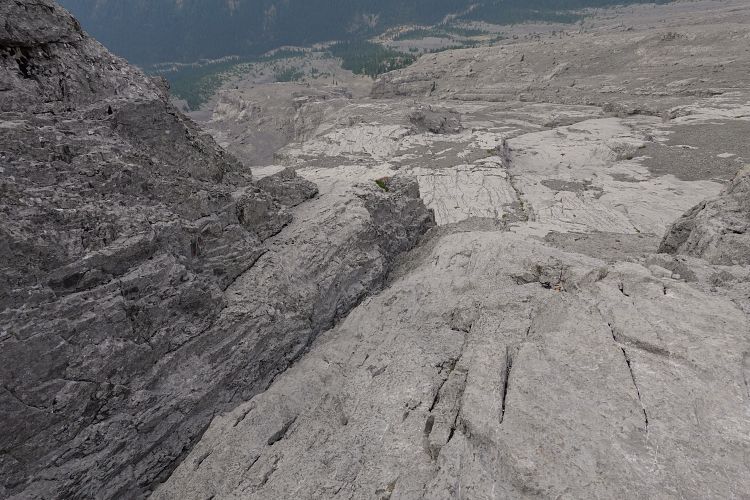
At least two more cruxes followed in short succession. They felt slightly easier but are still in the difficult scrambling/climbing realm. Crux #2 is another cliffband that’s less steep than #1, but just as crumbly and exposed. Crux #3 is right above, a steep wall with a crack and small holds, but the rock quality is better. Past the cruxes we still had to navigate downsloping slabs covered in rubble, a crumbly narrow ridge crest, and a short downclimb in order to get to the summit.
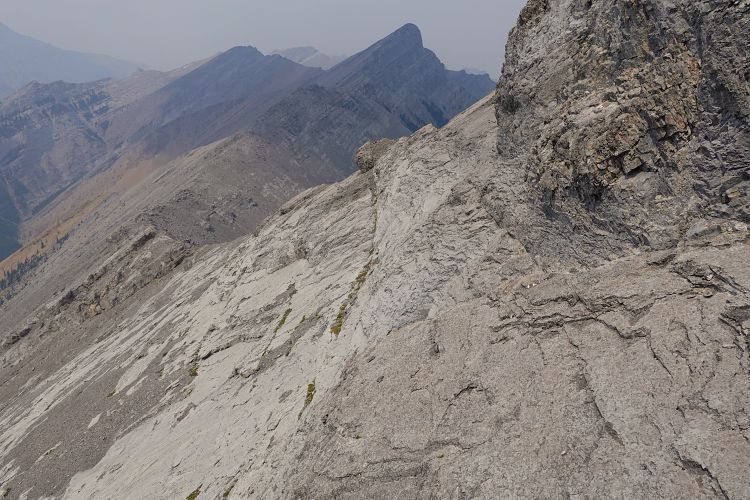
The old cairn looked pretty shattered and no register was to be found, so we left a new one and rebuilt the cairn. It was definitely a feeling of excitement to be standing up here and we didn’t even mind the smoky skies that obscured the silhouettes of nearby Yamnuska, Goat, Wendell and Fable. Our minds were now fully focused on getting back down safely.
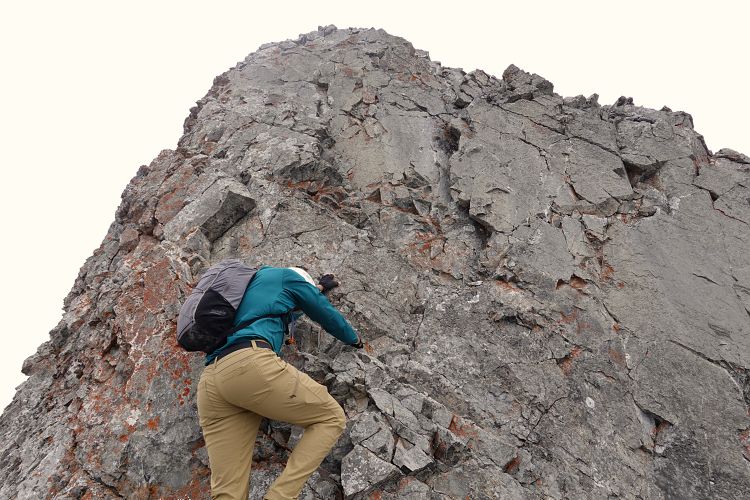
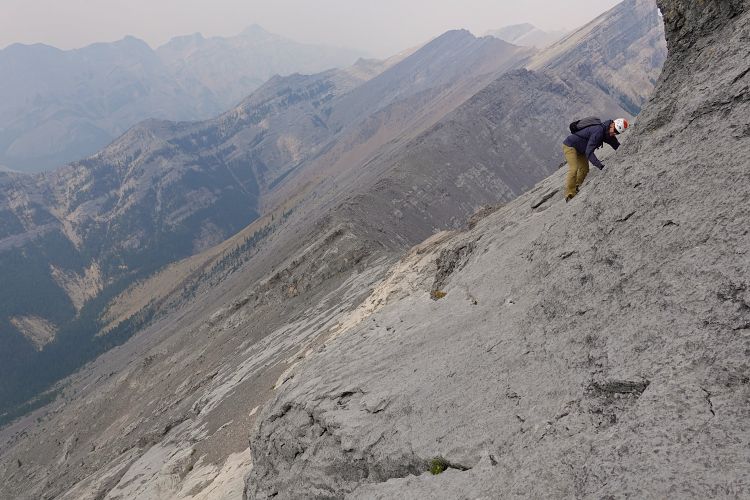
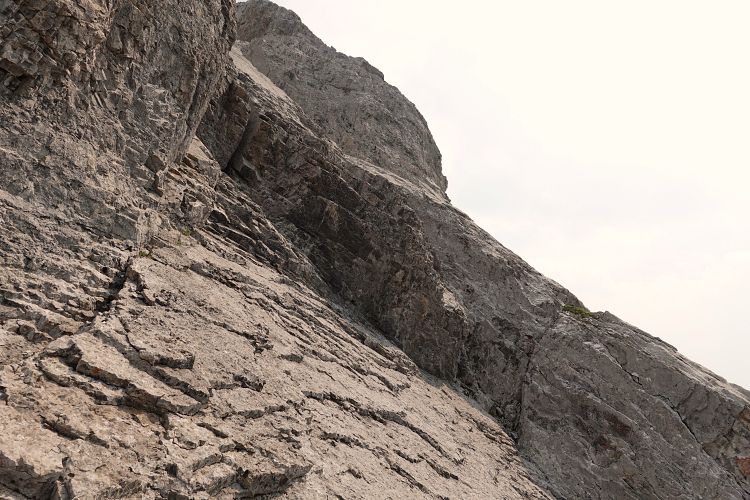
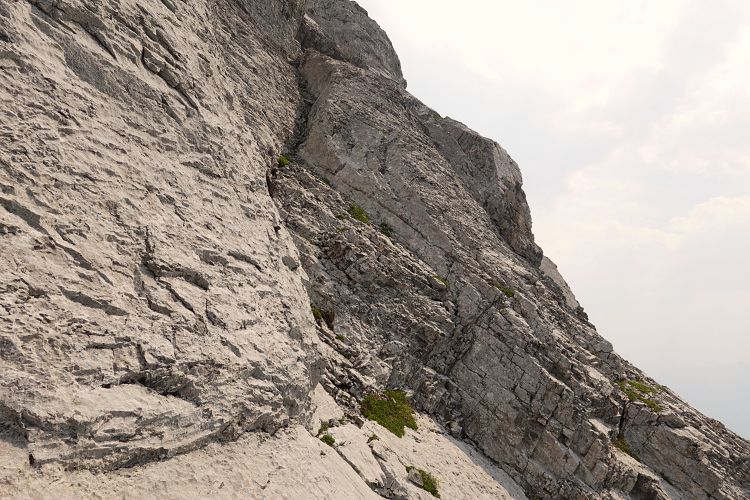
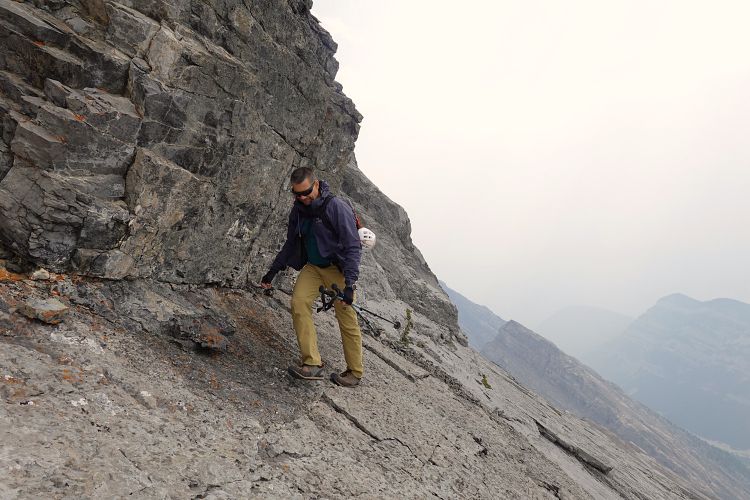
Downclimbing the upper two cruxes wasn’t easy but again we took our time, testing all holds carefully. Just above the lower and main crux, I noticed a steep gully further to the south. I wasn’t exactly keen to downclimb the vertical wall, so I went over to investigate the gully for an alternative route. The main challenge was that to get to the gully we first had to shuffle across steep, downsloping friction slabs with minimal or no handholds and a vertical drop-off below. It wasn’t to Kevin’s liking so he decided to go back and downclimb Crux #1, while I continued into the gully (steep but with some good stemming opportunities). I climbed out of the gully on skier’s left, down some friction slabs, then downclimbed a step to the right and across another steeply inclined slab into a second gully that was much easier and took me straight down to a grassy ledge below the level of Crux #1. Relieved that I it all worked out I scrambled back over to watch Kevin from below as he carefully downclimbed the vertical cliffband.
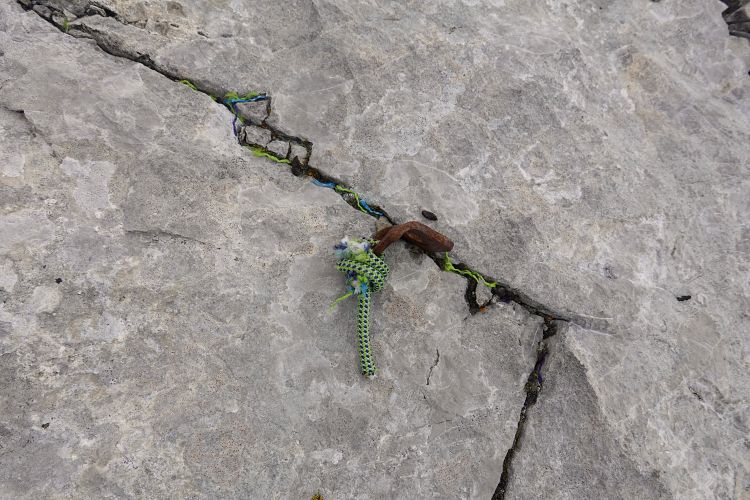
If I were to do this again I would probably choose the gully route over the vertical cliffband. Both routes are challenging and probably at least 5.4, perhaps even 5.6, but if you’re comfortable on steep friction slabs with severe exposure below, then the gully route is safer in my opinion because the rock is solid. My almost new La Sportiva TX3 approach shoes made a huge difference and felt super grippy on the dolomite rock here, but it’s a matter of personal comfort level. Kevin switched to rock shoes on the slabs and still didn’t feel it, but it is obvious that he’s more adept at and comfortable with downclimbing vertical pitches than me. Either route is not to be underestimated and, as I mentioned before, beyond the realm of what I’d consider scrambling. We saw two old pitons and a rappel sling on the upper slabs, but who knows what conditions those climbers encountered when they were up here. Any ice, snow, or wet rock would make this a whole different game.
Back at the Morrowmount-Hassel Castle saddle we sat down in the grass, switched out our gear and had a can of pop as a well-deserved victory drink. We took our time as we hiked back to Jura Creek and down the valley, feeling very elated and happy to have finally conquered this tough little beast.
See Kevin’s report and photos here.
|
Elevation: |
2430 m |
|
Elevation gain: |
1280 m |
|
Time: |
10.0 h |
|
Distance: |
19.6 km |
|
Difficulty level: |
~5.6 climb (YDS) |
|
Comments: |
Loose rock and unreliable holds; severe exposure. |
|
Personal rating: |
4 (out of 5) |

NOTE: This GPX track is for personal use only. Commercial use/re-use or publication of this track on printed or digital media including but not limited to platforms, apps and websites such as AllTrails, Gaia, and OSM, requires written permission.
DISCLAIMER: Use at your own risk for general guidance only! Do not follow this GPX track blindly but use your own judgement in assessing terrain and choosing the safest route. Please read the full disclaimer here.